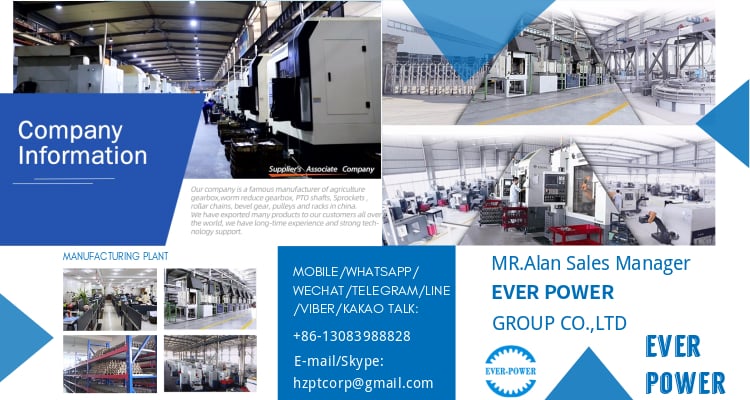
We – EPG Team the bigge EPT Chain and agricultural gearbox manufacturing facility in China with 5 different branches. For far more particulars: Mobile/whatsapp/telegram/Kakao us at: 0086~13083988828 13858117778 0571 88828
EPT Details:
Remember to, obey all site visitors rules.
Often put on a helmet whilst driving.
Keep in mind that you are driving a motorized bicycle and EPT site visitors could not be capable to see you.
Even if they do see you, they will not expect that you will be traveling as speedily as you are, and
the EPT site visitors will minimize out in front of you…guaranteed!
By no means work your motorized bicycle on a pedestrian by means of way, sidewalk, or bicycle route while
the motor is operating.
In no way work your motorized bicycle in an unsafe or disrespectful way.
SPECIFICATION OF BICYCLE Engine Kit
Engine Package Installation Instructions
Installation:
Mechanical aptitude is crucial for profitable set up.
Mo EPT 24″ or 26″ bicycle with diamond frame and a horizontal best tube must have ample tempo to
mount the engine
Action 1: The rear wheel sprocket shall be mounted 1st!
Take away the rear wheel from the bicycle.
Sprocket:
Get rid of the rear wheel sprocket and associated
mounting add-ons from the bag
Slit one particular of the rubber washer as revealed. This is to
allow the rubber washer to go about the rear wheel
shaft.
Insert the rubber washers as shown
Δ Mount the sprocket to the rear wheel as proven.
Δ Do not more than-tighten and make certain that the
sprocket is exactly perpendicular to the axis of
the wheel.
Δ Reinstall the rear wheel to bicycle.
Subsequent: The Carburetor
Get rid of valve system from the carburetor.
Insert throttle cable by way of screw cap. Insert spring return and hooked up conclude of cable to valve plunger.
Line up the cable and spring.
Run cable down to engine Substitute previously mentioned system into the carburetor.
Up coming: The Motor:
The engine is made to fit amongst the down tube and the seat tube of a common diamond frame
bicycle. EPT kinds of bicycle could require slight modifications.
Placement the engine so that when the exhau EPT silencer is put in, it points towards the ground nearly
parallel to the down tube.
The exhau EPT silencer needs to be removed to tighten the mounting nuts.
So when positioning the engine, there is no want to tighten the exhau EPT silencer to the engine.
Notice: If the bicycle body tubing is as well massive then you will have to use the bicycle body adapter.
(metal plate with 3 holes in the very same plastic bag there are 3 bolts 2 that go into the motor and one
longer 1 that goes by means of the bicycle body then via the motor mount)
As proven on photos below
Bicycle frame adapter Insert the 2 brief EPT bolts in to the motor
Bicycle body adapter put in to the engine
Location the engine on the bicycle body as shown
on photo
Mark the location of the centre hole of the bicycle
body adapter, you will want to drill a hole through
the bike frame on that area.
The for a longer time bolt goes by way of the bike body then by way of the motor mount) As shown on photographs below:
Following: Chain generate:
Take away chain go over and spark plug.
Split chain and feed into travel sprocket on motor.
Use box spanner presented to crank chain around
generate sprocket.
Get rid of surplus chain and reconnect.
Set up chain manual pulley.
Do not over-tension the chain.
Install chain guard and replace spark plug
Next: CDI Electrical Wiring Connections
There have been several concerns and confusion about how to set-up the wiring on a bicycle engine.
The photo under was despatched to me by a client of mine (thank you Dan) after I experienced described to him
how it should be completed. I since questioned him if it would be alright to po EPT it up here for every person to see
simply because he did these kinds of a wonderful work at drawing what I usually spend time composing.
I would compose it out, but the photo is rather a lot self-explanatory…if you even now have questions, you should let
me know.
As they say…”a photo is worth a thousand terms” and in this scenario it is.
On observing this photograph, an EPT man or woman despatched me the photograph underneath. Lyle hadn’t even positioned an order
but when he sent the image that he made, but he did get his CH80 a couple of times afterwards. It turned out very
great and among these two photos I do not feel it would be attainable for anyone to have queries still
…thanks for the photograph Lyle.
There have also been a couple of people out there that have lo EPT their spark. This is typically because of to excess
moisture receiving into the spot of the coil…drinking water and electrical energy will not mix effectively, lol.
Considering that several of us consider time and pride in obtaining our wiring all wrapped up nice and fairly I’ve posted
the below photos to demonstrate how the wiring connects onto the coil itself.
It is a great deal simpler to strike the connections with a soldering iron to eliminate the wires from the coil, then
get rid of the coil and re-connect the wires. Somebody has recently completed this but couldn’t recall which
wire went where so now I’ve set photographs up to display so anybody need to be in a position to do this. When you
are placing the new coil in area, it helps to use a piece of a organization card between the magnet and
the coil to keep some slight spacing in there…will not neglect to take away it soon after you have tightened down
the coil although.
Next: Clutch
Set up clutch lever below still left handle brake lever.
Run cable down to engine.
Insert heat protective spring (bigger spring wire) above cable.
Insert cable by means of anchor pivot.
Insert spring return in excess of clutch cable. Tighten cable to clutch lever on engine, guaranteeing that slack ju EPT .
taken out
The carburetor in the photograph bellow was taken out for clarity.
The concluded set up need to seem like this.
Next: Throttle
Get rid of current correct manage grip and replace with twi EPT throttle.
Current brake lever loosen and shifted to aid set up of twi EPT throttle
Exchange brake lever in its unique situation right after set up of the twi EPT throttle
Following: Fuel tank
Finally, mount the gasoline tank in excess of the prime tube.
Tighten the gas valve to the tank.
Lower source gasoline line to size and join gas valve to carburetor.
All set to go
Protected loose cables to body of bicycle with cable tie (not accomplished in photos).
Fill gasoline and lubricant combination in accordance with advice on the handbook.
Compress the clutch and start off cycling bicycle as standard. When sufficient pace is attained, launch the
clutch. This will start the engine.
To quit, compress and interact the clutch lever. Brake as standard.
To end the engine, choke the carburetor completely with the lever on the carburetor.
Alternatively, push the eliminate change which is presented. When engine is not working shut of fuel valve
totally.
one.Crucial: You should RE EPT THIS: Gasoline and Oil Combination for Gas ratio
The motor is a 2 cycle style, consequently, a gasoline/oil combination is necessary. During the crack-in
period of time (1 EPT gallon of gasoline), the ratio for 48cc is 25 areas gasoline to 1 element oil. Crack in ratio for 80cc is
20 to 1. Soon after the break-in period of time, the ratio is increased to thirty to 35 parts gasoline to 1 component oil.
*Be aware: Use only Synthetic 2 Stroke Oil to insure proper engine lubrication.
!WARNING!
Remember safety
1. Wipe up any spilled fuel. In no way gasoline a scorching motor or smoke while fueling. This could result in
sudden fireplace, personalized injuries. Often move your motorized bicycle at lea EPT 10 toes from any fueling area
prior to trying to start off it. In no way leave the tank gasoline cap off right after fueling as rain h2o will
contaminate the gasoline and trigger motor failure.
2. Open up the gas valve. Little lever pointed down with gasoline line is in the open placement.
three. Depress the tiny round cap plunger, ( Tickle button ), to prime carburetor. Found on left facet of
the carburetor following to the idle adju EPT screw. One or two instances is enough.
four. Lift choke lever to the upward position. This is the modest lever on the appropriate side of the carburetor.
All the way Up the choke is on. All the way Down the choke is off. Moveprogressively downward to
off place throughout engine heat up time period.
5. Pull the handlebar clutch lever inward, to disengage the engine from the rear wheel.
6. Pedal (down hill if feasible for fir EPT start off)
seven. Permit out the clutch lever all the way out and continuing to pedal. The consequence is a direct engine hook up
with the rear wheel by way of chain and sprocket and the engine will now begin spinning, Pedal until motor
starts off. Speed up little by little at very first.
eight. Twi EPT throttle to increase speed, reverse twi EPT throttle to lower speed. To stop, disengage clutch
and implement brakes. To speed up, pedal and launch clutch whilst opening throttle.
nine. Adju EPT choke to the smoothe EPT motor working situation.
10. Following warm up thrust choke lever all the way down. If motor races as well rapidly, or too slow, pull clutch
lever and lock in the notched capture, quit and adju EPT motor rpm.
eleven. If the rpm requirements modifying, flip the idle adju EPT screw (remaining side of carburetor) in or out gradually to
get the suitable idle speed of about 1400 rpm +/- 100 rpmTo accurately split the engine in, Do
not exceed fifteen mph or thirty min. continuous working for the fir EPT fifty HangZhous during motor brake in. Engine
will create a lot more electricity following split in.
12. To cease the motor, thrust Get rid of switch and turn off gas valve at tank. Turning off the gasoline will prevent
gas from becoming siphoned from tank. Warning Observe: By no means go away the tank fuel valve in “open up” position”
when motor is not working or the bike is in storage.
13. After or ahead of each journey verify all mounting fasteners, which includes hd. bolts, axle and brakes.
14. Warning Observe: Engine lock up or piston seizure owing to poor gasoline / oil mixture will not be
covered by factory warranty. This the obligation of the proprietor / operator to make certain the gasoline and
oil is combined accurately.
often Questioned Questions
Can I put in the bicycle engine package on a mountain bicycle?
Yes, you can transform your normal mountain bike into a motorized bicycle.
Are elements obtainable for the bicycle engine package?
Indeed, areas are offered as nicely as up grade components!
Does the bicycle motor kit arrives with every thing I want to put on my bike?
Indeed, this bicycle motor kit comes with definitely every thing you need
Do I need to have a driver license to ride a motorize bicycle?
In mo EPT states you don’t need to have a driver license to trip the motorized bicycle, but the regulation are various in
some states. We recommend that you check in you state.
Does this bicycle motor package suit all dimensions bikes?
No, this sort of bicycle motors kit was design for 26’inches bikes and some24 inch frame size bikes
Routine maintenance Routine
Clutch.
a) Get rid of correct facet go over from engine.
b) Place a little dab of grease at ear mesh location.
c) Exchange cover.
Carburetor
Dependent on dusty using circumstances, thoroughly clean air filter each 5 to twenty hrs of operation by
eliminating the filter go over to access the monitor and aspect. Wash aspect with a
degreasing agent. Be confident factor is totally dry just before re-assembly.
Spark Plug
Take away spark plug and examine for excess carbon create up. Clear, re-gap to .6mm – .7mm
if necessary. Verify plug after every twenty hours of operation. A suitable alternative plug is
NGK BP-6L if you can uncover it. Normally, go for the NGK B-6L. The NGK R7- EPT is
also advisable for much better overall performance and smo EPT idling.
Exhau EPT system
Right after twenty several hours of operation examine exhau EPT pipe for excessive oil and carbon build-up. Be
certain to use equipped assist strap to protected exhau EPT muffler to reliable anchor level on bike
body or engine.
a) Get rid of exhau EPT pipe cap by loosening the retaining screw.
b) Pull cap and baffle out of pipe.
c) Cleanse with degreaser, rinse and dry.
d) Re-assemble
Be aware:
Too much periods of reduced pace operation, idling or leaving gasoline petcock in the “on”
place in the course of shut down intervals might trigger the pipe to become clogged with unburned
gasoline.
Chain
Each time bike is ridden check out the rigidity of the travel chain by:
a) Rolling to bicycle forward to take away slack from the bottom of the chain.
b) Uncover middle & drive downward on the leading of chain whilst measuring the deflection.
c) Tighten chain if deflection is much more than 15mm.
d) Reduced pace “chain rattle” can be eliminated with the software of graphite grease to chain.
Head Bolts
Tighten all fasteners after each 5 hrs of procedure. It really is mo EPT essential to check
cylinder head bolts: tighten in an X sample to 12 ft/lb. using a torque wrench. A twopiece
cylinder and head design motor calls for head bolts be kept limited.
Essential:
Verify head bolts just before each and every and each and every journey, vibration can lead to them to loosen and
blow a head gasket. Caution: Do not more than torque or head bolts may possibly break off.
Appropriate aspect gears
Take away go over plate and hold small amount of hefty grease on equipment practice.
Do not above grease as leaks will arise and also could adversely impact clutch operation.
Standard greasing if essential will aid reduce gear use and preserve gear practice silent.
EPT Information
Obey all visitors restrictions. Constantly wear an accepted helmet whil EPT using. Remember
that you are using a motorized bicycle and EPT visitors could not be capable to see you.
Never ever function your motorized bicycle on a pedestrian thoroughfare or pathway whil EPT the
engine is operation. Never function you motorized bicycle in an unsafe way.
Verify YOUR Neighborhood AND State Rules Prior to Driving ON STREETS.
Make sure you go through this petrol and oil combination ratio.
The motor is a 2-stroke design consequently a petrol/oil mixture is required. Fir EPT 3 tanks
of gasoline use 6 ounces of 2-stroke oil to 1 gallon of gasoline. Right after the fir EPT 3 tanks, use 4 ounces
of oil to 1 gallon of fuel.
USE 93 Grade (Top quality) GASOLINE. Be sure to mix gas and oil before
introducing to tank. Do not incorporate individually.
Do not exceed 20km/h for the duration of crack in period. Pace may be elevated to 35km/h after
the fir EPT 500km.
Use only large-grade 2-stroke motorbike oil to guarantee proper engine lubrication.
WARING:
Bear in mind basic safety initial. Wipe up any spilt gas. Never refuel a sizzling engine or smoke whilst
refueling. This could result in fireplace and personal damage. Usually transfer your motorized bike
at lea EPT 3 meters from any refueling location ahead of trying to begin it. By no means go away the
tank fuel cap off right after refueling as rainwater could contaminate the fuel and lead to engine
failure.
one) Open the gas valve. Tiny lever pointed down with gasoline line is in the open placement.
2) Depress the modest spherical cap plunger (tickle button), to prime carburetor.One or two times are
adequate.
3) Elevate choke lever to the upward situation. This is the little lever on the appropriate side of the carburetor.
All the way up the choke is on. All the way down the choke is off. Move progressively downward to off
place throughout engine warm up period of time.
four) Pull the handlebar clutch lever inward, to disengage the engine from the rear wheel.
5) Pedal (down hill if feasible for fir EPT commence).
6) Allow out the clutch lever all the way out and continuing to pedal. The consequence is a immediate engine hooks up
with the rear wheel via chain and sprocket and the engine will now begin spinning, pedal until motor
starts . Accelerate gradually at 1st.
7) Twi EPT throttle to improve pace, reverse twi EPT throttle to lower pace.To end, disengage clutch
and apply breaks. To accelerate, pedal and launch clutch whil EPT opening throttle.
8) Adju EPT choke to the smoothe EPT motor managing placement.
nine) Right after warm up push choke lever all the way down. If engine races as well fast,or too gradual, pull clutch lever
and lock in the notched catch, quit and adju EPT motor rpm.
ten) If the rpm requirements changing, flip the idle adju EPT screw (best of carburetor) in or out gradually to get the
proper idle pace of about 1400 rpm +/- 100 rpm. To appropriately split the engine in, do not exceed 25
kph or thirty min. continual working for the fir EPT eighty klms in the course of motor crack in. Engine will build more
electrical power following crack in.
eleven) To end the motor, drive get rid of swap and change off gas valve at tank. Turning off the fuel will prevent
gas from getting siphoned from tank. In no way leave the tank gasoline valve in “open up” placement when engine is
not working or the bicycle is in storage.
twelve) Af ter or just before each and every experience examine all mounting fasteners, like head bolts, axle and brakes.
13) Warning: Engine lock up or piston seizure owing to poor petrol/oil mixture will happen. This
duty of the proprietor/operator to make sure the petrol and oil is blended accurately.
The use of authentic products manufacturer’s (OEM) part quantities or logos , e.g. CASE® and John Deere® are for reference purposes only and for indicating product use and compatibility. Our company and the listed alternative areas contained herein are not sponsored, approved, or created by the OEM.